So, this is a bit of an oldie, but still very useful to know in my opinion. I think that, with all the new people joining the Power Platform in the last few years and with Power Automate being the main “weapon of choice” for anything Workflow related, the good ol’ Workflow Engine might not be as wildly know or used anymore.
Don’t get me wrong, Power Automate brings massive improvements when it comes to Workflows, but there are a few use cases where a Real Time Workflow that executes within the Dataverse message transaction can be quite useful.
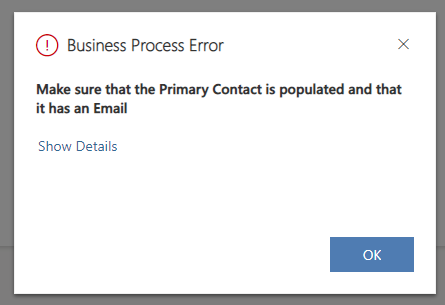
For example, if you have a validation that you want to use and display an error message to the end user and want that to run server side, so that even if the request is done through the API the validation runs.
“Why not use a Business Rule with Context set to Entity?” I can hear you ask already (and with good reason). While Business Rules work for traditional fields, for Lookups that won’t be possible. Plus if you have the need to have a custom validation that requires you write some code this is the way to go.
So I’ll leave here how to create a quick Real Time Workflow that validates a Lookup field and if it doesn’t have the expected value you show the end user an error.
Create a Real-time Workflow
To create a real-time workflow in Dataverse, follow these steps:
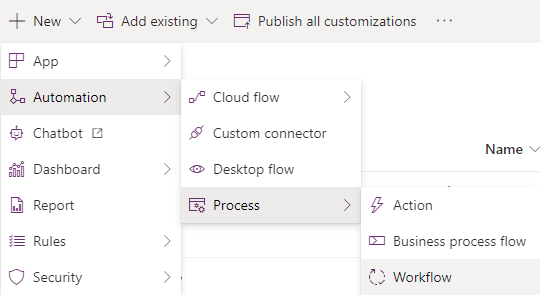
From the maker portal, navigate into your solution and click New – Automation – Process – Workflow.
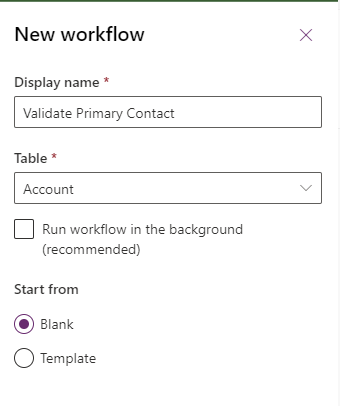
In the New Workflow window, enter a name for the workflow and make sure you untick the “Run workflow in the background” option. Hit create. Here’s what that looks like:
This will create the workflow and open up the classic editor in a new tab. This is where you’ll add your logic.
In this example we’ll just do a quick validation on the related contact record when the contact lookup is populated on the Account, and throw an error if that condition is true.
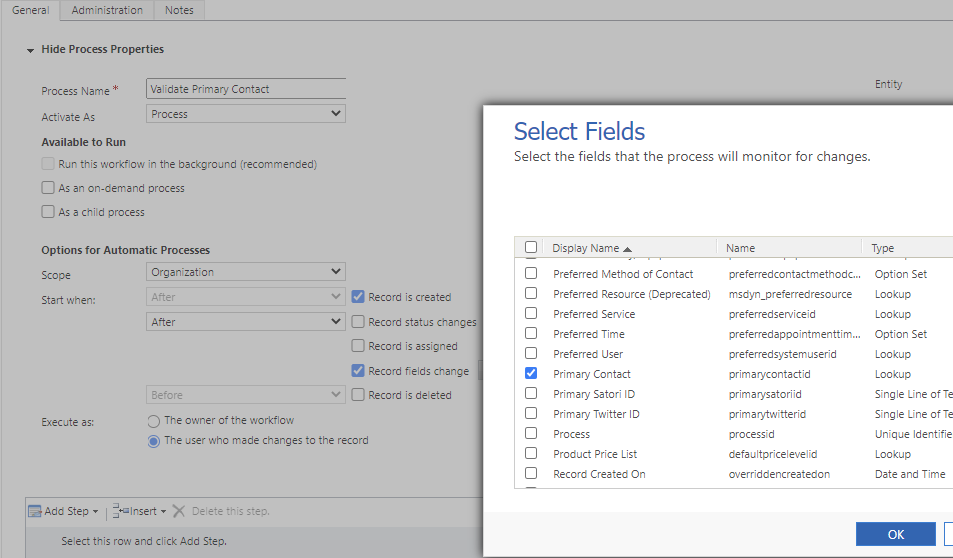
To do that, first set the trigger condition, in our case it’ll be create or update of the Contact Lookup field:
Next, we need our conditions. Select Add Step and “Check Condition”. We’ll then set the condition to be what we want it to be. Let’s say we want to force a contact with an email to be select:
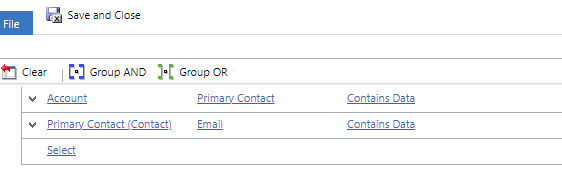
If this is true then Successfully terminate the Workflow.
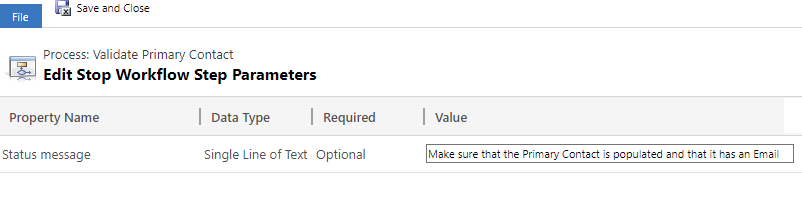
If not then Cancel the workflow and send a message to the user:
This is what our final Workflow should look like:
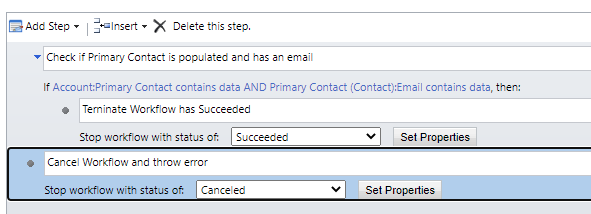
All that’s left to do is to Save and Activate the Workflow.
From now one, if you try to create a new Account the workflow will run and prevent you from doing it if the conditions aren’t met. Because it’s server side it doesn’t matter if it’s from the form or from the API: